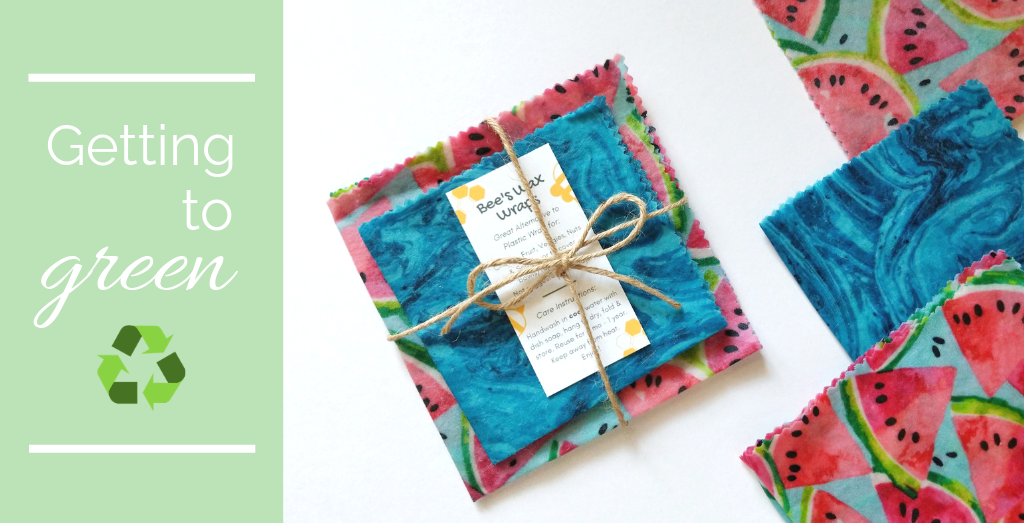
For the holidays this past year, I wanted to give gifts that were not only eco-friendly (sans harmful packaging and production processes) but that would also encourage the recipient to make small, eco-friendly lifestyle changes. I decided on homemade beeswax wraps, since these have been one of my personal favorite single-use plastic alternatives, and are so easy to incorporate into your daily habits. (If you want other tips on easy ways to reduce single-use plastics in the kitchen, check out this blog I wrote!)
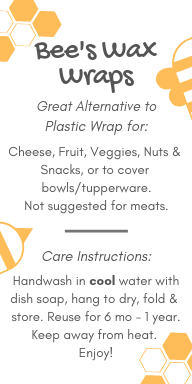
If you aren’t familiar with beeswax wraps, they are a plastic wrap alternative that are great for cheese, fruit, veggies, nuts and other snacks, or to cover bowls/tupperware. They are washable and can be reused for up to a year! The wraps have actually been easier for me to use than plastic wrap, because they easily mold to the shape of whatever you’re wrapping, and seal with the heat from your hands. Just keep in mind, they are not recommended for use on meats, and should be kept away from heat to avoid melting the wax. At the end of this post is a care instructions card that I included with each of the wraps I gifted for reference!
After reading a few “how-to” blogs on beeswax wraps, I came up with my own recipe and started experimenting. It took a few tries, and I’ll admit was a longer process than I expected. I'm not sure I would recommend the homemade route if you are just planning to make a couple wraps (in that case it may make more sense to purchase them), as it does require several ingredients that are easier purchased in bulk, and takes some time to figure out the process. However, these did make awesome eco-friendly gifts that the recipients were all super excited about! Below are the ingredients and instructions that worked best for me, and I hope these will help you on your journey of getting a little closer to green living!
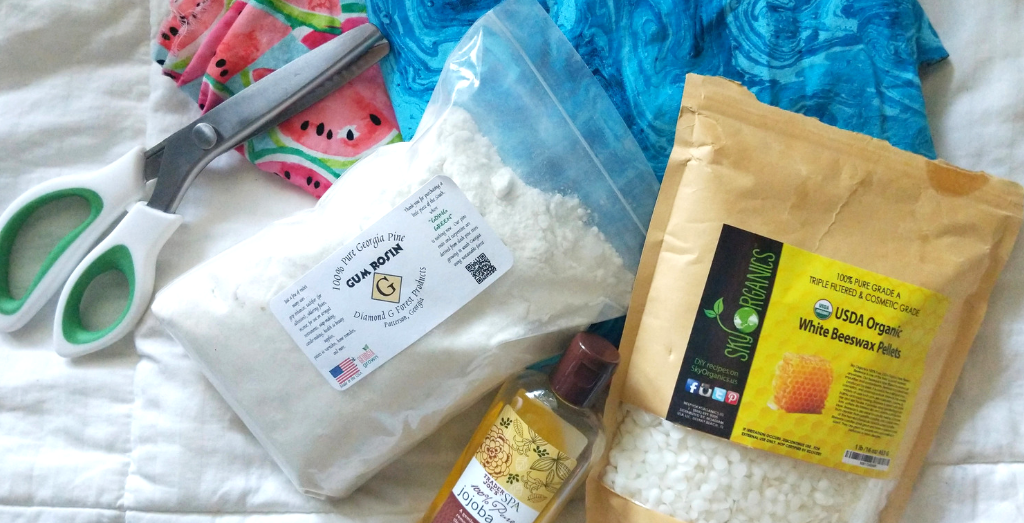
What you’ll need:
-
Scissors (I used pinking shears because they prevent the fabric from fraying when you cut it, but you can use any sharp scissors! The beeswax should prevent the fabric from unraveling and you can just cut away any frays.)
-
100% Cotton Fabric (I bought mine in bulk from a local craft store since I was making several wraps, but you can also try to find fabric at your local thrift store in the spirit of reusing and recycling!)
-
Beeswax (I bought this bulk bag of pellets, but you can also buy beeswax by the ounce if you are only making a few wraps. If you buy it in bar form, you will just need to grate it before use.)
-
Jojoba Oil (This adds flexibility to your wraps, and allows them to be molded to fit around whatever you are wrapping.)
-
Pine Rosin (Again, I bought a bulk bag of this, if you don’t need all of it, you can always share with friends! It will be far easier to use if you find it in powdered versus crystal form. This adds the bit of stickiness to the wrap which allows it to seal onto itself around whatever you are wrapping.)
-
Parchment Paper (NOT foil, which causes too much wax clumping. I used eco-friendly parchment paper that I found at Sprouts.)
-
Paint Brush (One you don’t care about, as it will be nearly impossible to clean off the wax after using it!)
- Baking Sheet
Instructions:
- Wash and dry fabric.
- Cut fabric into size of your choice. (I did 12” x 12” and 15” x 15” sizes.)
- Preheat oven to 275 degrees.
- Place parchment paper on baking sheet.
-
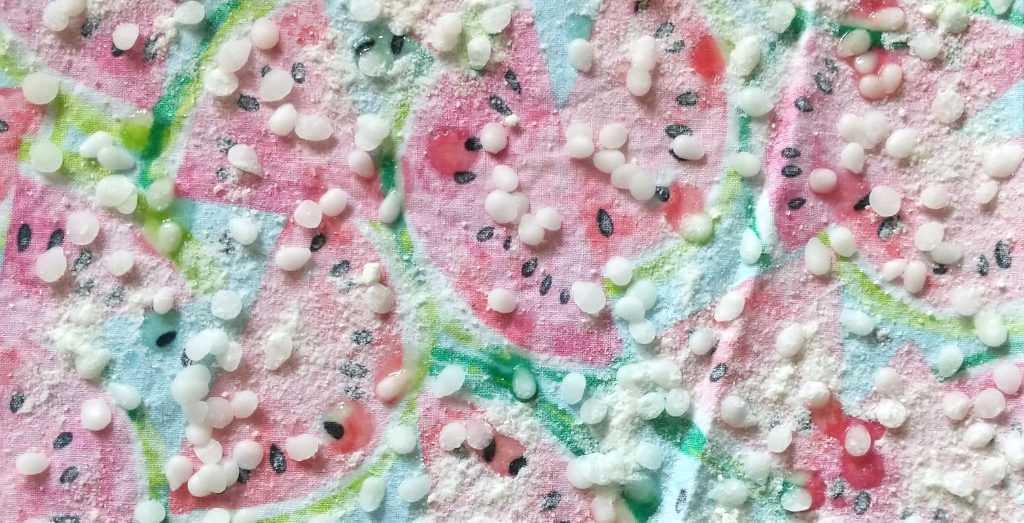
Put cut fabric piece on the parchment paper and sprinkle beeswax pellets (or grated beeswax), pine rosin and jojoba oil evenly covering the fabric (For the 12” x 12” wraps I did about 1-1.5 tablespoons each of beeswax pellets and pine rosin, and about 8-10 drops of jojoba oil. See photo below to get an idea of the coverage you should have.)
- Place baking sheet in the heated oven for 7-8 minutes.
- Remove from oven and use paint brush to evenly coat the fabric with the melted wax, rosin and oil. Work as quickly as possible to prevent wax from solidifying.
- Place back in the oven for 3-4 minutes. (You may need to repeat the process of brushing the fabric after heating a second time to ensure even coating.)
- Remove from oven and carefully and quickly lift the fabric off of the parchment by the corners. It will be hot, so use tongs if necessary.
-
Wave in the air to let cool for about 1 minute then set aside to fully dry. (I suggest wearing clothes you don’t care about for this part, as I ended up getting very small specs of the mixture on my shirt that were difficult to get out.)
-
Rinse with cool water and dry, then they're ready to use!
If you notice the wax is not being distributed evenly on the fabric, it may need longer in the oven to fully melt before you start brushing. If your wraps are cracking or have any clumps of wax once you are finished making them, or at any point during their lifetime, you can simply pop them back into the oven and repeat the brushing process as needed.
Fabric covered with beeswax pellets, pine rosin and jojoba oil:
Finished wraps:
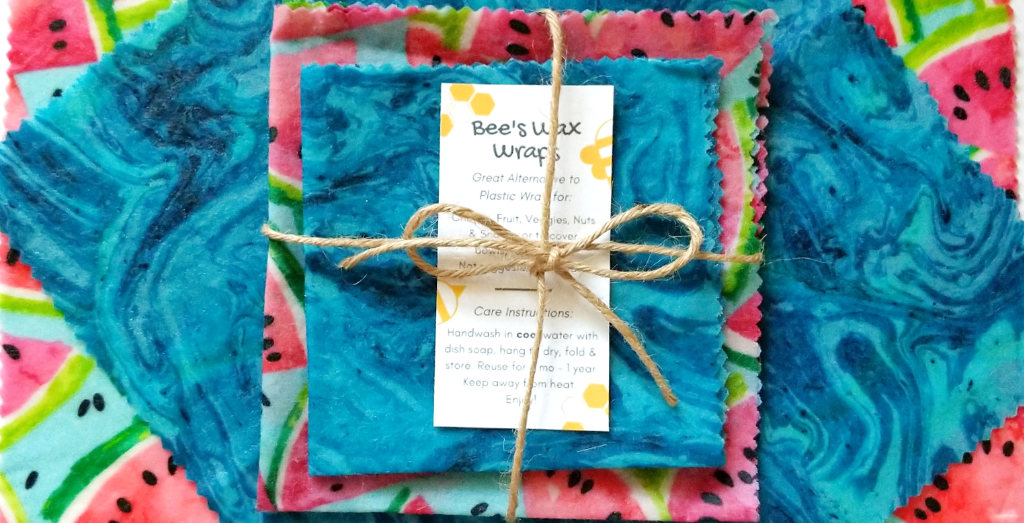
The care and use instructions card I gave with my gifts:
Enjoy! If you try this, I would love to hear and see how your wraps turn out!
Talk soon,
Janell
Pin this post:

P.S. You can learn more about Clam & Clasp and check out our products here! We donate 20% of profits from each purchase of our handcrafted seashell jewelry to organizations focused on ocean conservation and keeping our planet healthy.
